Custom Jewelry Creation -Leveragig Pendant Settings: From Loose Gemstones to Finished Pendants
A Guide to Pendant Settings for Loose Gemstones – Let's Make Some Magic!
Ever held a loose gemstone and thought, "Wow, this would make an amazing pendant"? I know I have! Turning gemstones into personalized jewelry is seriously rewarding, and honestly, it's totally achievable with a little know-how. I’ve put together this guide to walk you through everything, from picking the perfect setting to showing off your finished piece. Ready to jump in?
How to Choose a Pendant Setting (It's Easier Than You Think!)
Think of the setting as more than just a frame; it's what keeps your precious gem safe and really shows off its sparkle. Getting a handle on the different types of settings and what they're good for is the first step in making something truly special.
Pendant Settings 101: Prong, Bezel, and Beyond
There's a whole universe of pendant settings out there, and each one brings its own style and level of security to the table.
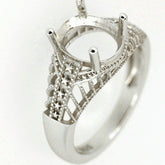
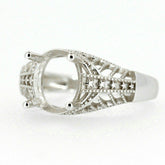
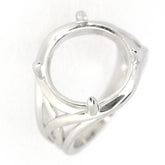
- Prong Settings: These are your classic "claw" settings, where metal prongs grip the stone. They let in tons of light, which means maximum brilliance.
- Bezel Settings: A metal rim wraps around the stone, offering fantastic protection and a super sleek, modern vibe.
- Channel Settings: Perfect for those tiny, sparkly stones. They sit snugly in a row inside a metal channel.
- Tension Settings: These are kinda cool – they use pressure to hold the stone, making for a dramatic and contemporary look.
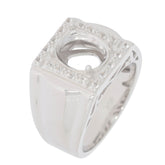
- Pave Settings: Imagine a surface just covered in tiny gems, all set closely together. That's pave – pure dazzle!
My Little Gem Pro-Tip: I always think about how hard a gemstone is when choosing a setting. Softer stones, like opals, really benefit from the extra protection of a bezel setting. Tougher stones, like diamonds, can really shine (literally!) in a prong setting.
Matching Settings to Gem Cuts and Sizes: Getting It Just Right
The shape and size of your gemstone really matter when you're picking a setting.
- Emerald Cut: Emerald cut stones are rectangular, so you need a setting designed to cradle that shape and show off those elegant lines.
- Round Cut: Round gems are super versatile. Prong, bezel, even tension settings – they all work!
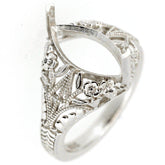
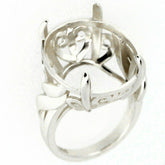
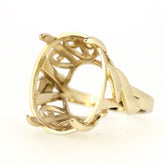
- Unique Shapes: Got a uniquely shaped stone? Custom pendant mountings are the way to go to really complement that one-of-a-kind shape.
A Quick Story: That Sapphire Pendant We Made
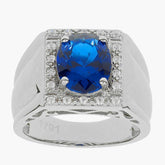
I remember this one time, we had a client with this gorgeous oval sapphire. We chatted about her style, and we landed on a custom bezel setting in white gold. It really brought out the stone's color and gave it that extra protection she needed for everyday wear. It was stunning!
The Nitty-Gritty: Pros and Cons of Different Setting Styles
| Setting Style | What's Great | What's Not So Great |
|---|---|---|
| Prong | Super sparkly, classic | Stone's a bit more exposed |
| Bezel | Really protects the stone, modern | Can cover a bit of the stone |
| Channel | Perfect for small stones, sleek | Not ideal for larger gems |
| Tension | Dramatic, unique | Tricky to make, can be pricey to fix |
| Pave | Super dazzling | Those tiny stones can sometimes pop out |
Ready to dive in and find that perfect setting? Check out our Pendant Setting Collection
Design Tips and Tricks: Unleash Your Inner Artist!
Once you've got the basics of pendant settings down, you can start designing your custom pendant. Here are a few ideas to get those creative juices flowing:
Sketching and Planning: Get It on Paper (or Screen!)
Before you even touch any metal, sketch out your design. Play around with different shapes, styles, and materials.
- Think about the overall vibe you're going for: classic? Modern? Minimalist? Super detailed?
- Digital design is cool too! Software like Procreate or Autodesk Sketchbook can be awesome.
- Make a mood board with images that inspire you. Seriously, it helps!
Another Little Tip from Me: Don't be afraid to go wild with ideas! Try everything out on paper before you commit. Trust me, it's way easier to erase a line than to redo a metal piece.
Metals and Materials: Making the Right Choices
The metal you pick makes a huge difference in how the pendant looks.
- Gold: Adds warmth and a touch of luxury.
- Silver: Cool and modern.
- Rose Gold: Romantic, with a vintage feel.
- Platinum: Super durable and good for sensitive skin.
You can even mix metals for cool accents! And don't forget about other materials like enamel, resin, or even wood for extra texture and color.
Personal Touches: Make It Truly Yours
What makes a custom pendant truly special is those personal details.
- Add symbols or motifs that mean something to you.
- Engrave a special message.
- Incorporate birthstones or other meaningful gems.
These little things turn your pendant into something you'll cherish forever.
Feeling inspired but need a little help? Get a Free Custom Pendant Design Quote
Tools and Materials: Gearing Up for Success
To make your design a reality, you'll need the right tools and materials.
The Jewelry-Making Essentials
- Pliers (flat-nose, round-nose, chain-nose) – these are your best friends!
- Cutters
- Files
- Soldering torch and solder
- Measuring tools (ruler, calipers)
- Polishing compounds
Stone-Setting Gear
- Bezel pushers
- Prong pushers
- Gravers
- A microscope or magnifying glass – trust me, you'll need it!
Finding the Good Stuff: Sourcing Materials
- Look for suppliers with a good reputation and a wide selection of metals, gemstones, and findings.
- Think about where your materials come from and if they're ethically sourced.
- Choose suppliers that care about sustainability.
Your Handy Jewelry-Making Checklist [Downloadable PDF]
Step-by-Step: Let's Make a Pendant!
Okay, you've got your design, your tools, and your materials. Let's do this!
- Prep Your Gemstone: Clean it like crazy to get rid of any dirt or oils. Give it a good look to see if there are any flaws or damage.
- Secure That Stone: This is where you carefully secure the gemstone in the setting using your stone-setting tools. Go slow and apply even pressure so you don't damage anything.
- Finishing Time: Check the pendant for any little imperfections. Polish the metal until it shines. Make sure everything is nice and secure.
Show Off Your Masterpiece (and Keep It Looking Great!)
You did it! Now, let's show off your creation and make sure it stays beautiful.
Taking Great Jewelry Photos
- Use natural light – it's the best! And a simple background.
- Play with different angles and see what looks cool.
Cleaning and Care Tips
- Clean it regularly with a soft cloth and gentle soap.
- Stay away from harsh chemicals and abrasive cleaners.
- Store it in a jewelry box or pouch.
Share Your Passion!
Let the world see what you've been up to!
- Post your creations on social media, sell them online, or hit up some local craft fairs.
- Connect with other jewelry makers and swap ideas. It's a blast!
So, what's the trickiest part of jewelry design for you? Let me know in the comments! I'd love to hear your thoughts.
Making custom pendants from loose gemstones is super rewarding. With the right settings, techniques, and a little personal flair, you can create jewelry that will be treasured for years to come. If you found this guide helpful, pass it along to a fellow maker!
Ready to level up your jewelry-making skills? Check out our Advanced Jewelry Design Course

