Cómo elegir la cera adecuada para la joyería de fundición a la cera perdida
Déjame decirte, elegir la cera adecuada para tus proyectos de fundición a la cera perdida es una de esas decisiones cruciales que realmente pueden hacer o deshacer tus piezas finales. Afecta directamente el detalle, la precisión y la calidad general de tu joyería. No importa si recién comienzas o si llevas años en el banco; entender los diferentes tipos de cera para joyería es absolutamente esencial. En esta guía, vamos a ir más allá de lo básico. Incluyo algunos consejos para resolver problemas de nuestros propios maestros joyeros aquí e incluso un cuadro comparativo de ceras descargable para ayudarte a navegar todas las sutilezas, desde la clásica Ferris Firm Green Wax hasta las especializadas láminas de cera para fundición. Mi objetivo es ayudarte a elegir la mejor cera para la creación de joyas. Nos adentraremos en los detalles de los materiales para tallado en cera, desglosaremos las propiedades críticas de la cera para fundición y finalmente resolveremos el debate entre cera dura vs cera blanda, todo para empoderarte a crear esos diseños impresionantes y detallados que imaginas.
Tabla de Contenidos:
- Tipos clave de cera para fundición de joyería
- Materiales y Herramientas Esenciales para el Tallado de Cera
- Cómo las Propiedades de la Cera Impactan Tu Fundición
- Guía paso a paso para la fundición a la cera perdida
- Consejos para principiantes en el tallado en cera
- Técnicas Avanzadas para Fundición Profesional
- Tabla Comparativa de Ceras & Guía de Selección
- Preguntas frecuentes (FAQ)
Tipos clave de cera para fundición de joyería
El mundo de la fundición a la cera perdida tiene todo un espectro de ceras, y cada una está diseñada con características específicas para adaptarse a diferentes necesidades en la fabricación de joyas. Familiarizarse con estas distinciones es realmente la base para obtener excelentes resultados en tus proyectos de fundición.
Tipos populares de cera para fabricación de joyas
 Entre todas las ceras para joyería, algunas realmente destacan por ser confiables y versátiles. Las ceras para tallar, como la conocida Ferris Firm Green Wax, son muy populares porque tienen propiedades fantásticas para tallar que permiten obtener detalles súper nítidos y acabados suaves. Las ceras para inyección, por otro lado, son las que normalmente usarás con un inyector de cera. Son perfectas para crear muchos modelos idénticos a partir de un molde maestro, lo que es una salvación para las producciones en serie. Luego están las ceras en láminas, o láminas de cera para fundición, que vienen en una forma plana muy práctica. Las usamos para cortar, enrollar o envolver; son geniales para diseños geométricos o para construir estructuras más grandes. También notarás los diferentes colores, que usualmente te indican la dureza o el punto de fusión de la cera, sirviendo como una guía visual rápida para los joyeros.
Cera dura vs cera blanda: diferencias clave
Entonces, ¿deberías elegir cera dura o blanda? Realmente depende del nivel de detalle que busques y de la complejidad de tu diseño. La cera dura, que suele ser más densa y un poco más quebradiza, es la que uso cuando estoy tallando detalles intrincados, bordes nítidos o filigranas delicadas. Su rigidez significa que no se deformará tanto mientras la manipulas e inviertes. Piensa en ceras azules, verdes y moradas. Por otro lado, la cera blanda es más flexible y menos propensa a romperse, lo que la hace más adecuada para diseños que necesitan algo de flexibilidad. Es perfecta para crear formas orgánicas, esculturas de forma libre o para moldeo por inyección donde necesitas que la cera fluya fácilmente. Las ceras rosas y rojas suelen entrar en esta categoría más blanda. Las propiedades para fundición varían drásticamente según esta dureza, afectando todo, desde la facilidad de trabajo hasta la limpieza con la que se quema en el molde.

Elegir la Cera Correcta para Tu Diseño
Elegir la cera adecuada significa que debes pensar en algunas cosas: qué tan complejo es tu diseño, cómo te gusta trabajar y qué nivel de detalle quieres alcanzar. Para esos diseños súper detallados que necesitan un tallado preciso, una cera dura para tallar como Ferris Firm Green Wax es una excelente opción. Si estás haciendo perfiles personalizados o construyendo formas más grandes, podrías encontrar que las láminas de cera para fundición son más eficientes. Y para principiantes, usualmente sugiero una cera para principiantes de dureza media. Ofrece un buen equilibrio entre mantener el detalle y ser fácil de tallar, haciendo que sea una forma más indulgente de iniciarse en el oficio. Al final del día, la mejor cera para joyería realmente depende de lo que tu proyecto específico necesite y de tu propio estilo personal de escultura.

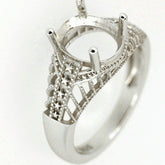
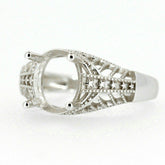
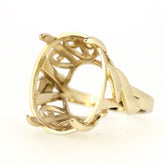
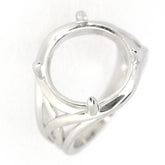
Proyecto Destacado: Un Anillo de Compromiso Delicado.
Recuerdo haber trabajado en esta pieza: usamos Ferris Firm Green Wax para conseguir esos detalles de garras realmente nítidos y el filigrana intrincado bajo el engaste. La firmeza de esta cera fue una salvación porque significó que casi no tuvimos distorsión durante todo ese tallado detallado.
Materiales y Herramientas Esenciales para el Tallado de Cera
Si quieres obtener resultados de calidad profesional en el tallado de cera, debes tener el conjunto correcto de materiales para tallado de cera y herramientas de precisión. Estos son los que te permiten hacer el trabajo intrincado de remover y dar forma a la cera para dar vida a tus diseños.
Herramientas Básicas para el Tallado de Cera
"Cada gran pieza de joyería comienza con la base correcta. Para la cera, eso significa herramientas afiladas y una visión clara."
Para cualquiera que esté comenzando su camino en el tallado de cera, un kit básico debe incluir limas de cera, varias tamaños de fresas y brocas para tallado (para una herramienta rotatoria como un Foredom o Dremel), y una buena selección de herramientas manuales para tallar. He descubierto que los raspadores de metal, herramientas dentales y cuchillos especialmente diseñados para cera son invaluables para remover material, dar forma a los contornos y alisar superficies. Y honestamente, un magnificador confiable u optivisor es imprescindible para ver esos detalles diminutos. Estas herramientas, junto con la cera para joyería adecuada, conforman el equipo básico para cualquier escultor de cera.
Equipos Avanzados para Diseños Detallados
A medida que tus habilidades crecen o tus diseños se vuelven más ambiciosos, algunos equipos avanzados pueden ampliar realmente lo que eres capaz de hacer. Los bolígrafos de cera con puntas intercambiables te brindan un control increíble para derretir y añadir cera, lo cual es muy útil para reparaciones o para construir detalles finos. Los talladores eléctricos de cera tienen puntas calentadas que permiten un tallado y acabado suaves y sin esfuerzo. Para detalles microscópicos, las piezas de mano dentales de alta velocidad ofrecen una precisión increíble. Y para quienes usamos métodos digitales, un sistema CAD/CAM combinado con un molino de cera puede producir cera para diseños detallados increíblemente precisa y compleja.

Mantenimiento de Tus Herramientas de Tallado
Cuidar bien tus herramientas de tallado es fundamental para su rendimiento y duración. Siempre me aseguro de mantener mis fresas y limas limpias y libres de residuos de cera usando un cepillo de latón. Afila tus herramientas de tallado a mano regularmente: esto garantiza cortes nítidos y evita desgarrar la cera. Y por favor, guarda tus herramientas en un estuche o rollo protector para evitar dañar sus puntas delicadas. Un kit de herramientas bien mantenido no solo te ahorra dinero a largo plazo, sino que también te ayuda a producir modelos de cera de alta calidad de forma constante.
Cómo las Propiedades de la Cera Impactan Tu Fundición
Las propiedades específicas de diferentes ceras juegan un papel enorme en el éxito de todo el proceso de inversión y fundición. Cuando entiendes estas características, puedes elegir la mejor cera para modelos de joyería y anticiparte a cualquier problema potencial.
Temperatura de Fusión y Su Importancia
La temperatura de fusión de la cera es una propiedad realmente fundamental. Dicta cómo se comportará la cera cuando la estés tallando, inyectando y, lo más importante, durante la etapa de quemado en el proceso de fundición. Las ceras con puntos de fusión más altos suelen ser más duras y resisten mejor la deformación durante el manejo, lo que las hace ideales para tallados detallados y para quienes trabajamos en climas cálidos. Por otro lado, las ceras con puntos de fusión más bajos son perfectas para el moldeo por inyección porque fluyen muy bien. Durante el quemado, la cera debe desaparecer completamente del molde de inversión, sin dejar residuos. Una cera que se quema limpiamente asegura que la cavidad del molde esté impecable, lo cual es clave para prevenir defectos en tu fundición final de metal.
Flexibilidad y Retención de Detalles
La flexibilidad de una cera es otra propiedad clave a considerar, especialmente cuando estás creando estructuras delicadas o complejas, lo que a menudo requiere una cera específica para diseños detallados. Las ceras más suaves y flexibles pueden soportar un poco de flexión sin romperse, lo que puede ser una gran ventaja cuando estás construyendo formas intrincadas e entrelazadas. Sin embargo, la desventaja es que esta flexibilidad también puede hacer que sean más propensas a deformarse. Las ceras más duras, aunque más frágiles, son fantásticas para mantener líneas nítidas y detalles finos con una deformación mínima, por lo que son mi elección preferida para formas geométricas precisas y filigranas. Qué tan bien la cera mantiene los detalles finos es crucial, porque cualquier pequeña imperfección en ese modelo de cera se reflejará en la pieza final de metal.
Selección de cera para canales y modelos
Elegir la cera adecuada para diferentes partes de tu montaje es parte de lo que hace una buena guía de selección de cera. Para el modelo principal de joyería, la elección de la cera dependerá de la complejidad de tu diseño y de cómo planeas tallarlo. Pero para los canales de alimentación—que son los conductos por donde fluye el metal fundido—necesitas absolutamente una cera que sea rígida y que se queme limpiamente. A menudo preferimos una cera para canales más dura y estable con un punto de fusión más alto porque mantiene su forma bajo la presión de la inversión y maneja eficazmente el calor del quemado. Tomar estas decisiones estratégicas asegura tanto la integridad de tu modelo como un buen y eficiente flujo de metal durante la fundición.
Guía paso a paso para la fundición a la cera perdida
El proceso de fundición a la cera perdida puede parecer complicado, lo sé, pero es una forma increíblemente gratificante de crear joyas hermosas. La clave para fundiciones exitosas es simplemente seguir cada paso con cuidado.
Preparando tu modelo de cera
Nuestro viaje siempre comienza con un modelo de cera meticulosamente elaborado. Debes asegurarte de que tu cera para modelos de joyería esté perfectamente lisa, sin ningún pequeño defecto, y con todos los detalles claramente definidos. Recuerda, cualquier error en la cera se copiará fielmente en el metal. Limpio la cera a fondo para eliminar polvo, aceites o huellas dactilares porque pueden afectar la capacidad del material de inversión para adherirse y podrían causar defectos en la fundición más adelante. Este trabajo inicial realmente prepara el escenario para una pieza terminada impecable.

Añadiendo canales y realizando la inversión
Una vez que el modelo de cera está perfecto, le añadimos cera para canales de alimentación para crear un camino por donde el metal fundido pueda fluir y para dejar escapar los gases durante la fundición. El sistema de canales debe diseñarse cuidadosamente para asegurar que el metal fluya correctamente y llene todo el molde. Después de colocar los canales, el modelo de cera se fija a una base de goma y se coloca un cilindro metálico llamado molde alrededor. Luego, mezclamos el material de inversión—es una suspensión a base de yeso—y lo vertemos en el molde, cubriendo cuidadosamente todo el modelo de cera. Esto crea el molde que eventualmente contendrá el metal fundido.
Quemado de la cera y vertido del metal
El molde invertido luego se coloca en un horno de alta temperatura para el ciclo de "quemado". Aquí es donde las propiedades de temperatura de fusión de la cera son tan críticas. La cera se derrite y se vaporiza completamente, dejando una cavidad perfecta dentro del molde endurecido de la inversión. Este espacio vacío es una réplica exacta de tu modelo de cera, listo para el metal. Justo después del quemado, mientras el molde aún está caliente, vertemos metal fundido (como oro, plata o bronce) en la abertura del canal de alimentación, llenando el vacío. Comúnmente usamos técnicas como fundición centrífuga o al vacío para asegurarnos de que el metal llegue a cada último detalle. Una vez que se enfría, enfriamos la inversión, la rompemos y recuperamos la fundición de metal, que ahora está lista para todo el trabajo de acabado.
*¿Necesitas un visual? ¡Mira este diagrama de un sistema de canales completado listo para inversión!* (Marcador de imagen: Un diagrama que muestra un modelo de cera en una base de canales, con canales adjuntos, listo para inversión en un molde.)
Consejos para principiantes en el tallado en cera
Empezar con el tallado en cera puede parecer un poco intimidante, pero con el enfoque correcto y algo de práctica, te prometo que los principiantes pueden aprender rápido y comenzar a crear piezas hermosas.
Comenzando simple: diseños amigables para principiantes
Para cualquiera que sea nuevo en el oficio, recomiendo comenzar con diseños geométricos simples o formas pequeñas y lisas. Esto te permite dominar las técnicas básicas de tallado—como remover material, alisar y limar—sin la presión adicional de intentar lograr detalles intrincados de inmediato. También es buena idea experimentar con diferentes materiales para tallado en cera solo para sentir cómo difieren sus características. A medida que empieces a ganar confianza, puedes avanzar gradualmente a formas más complejas con curvas, ángulos y texturas superficiales.
Practicando con varios tipos de cera
No tengas miedo de experimentar con diferentes tipos de cera para joyería para descubrir cuál funciona mejor para tu estilo y los tipos de piezas que quieres hacer. Prueba tanto cera dura como blanda para entender realmente sus diferencias en el tallado de primera mano. Por ejemplo, la Cera Verde Ferris Firm es un excelente punto de partida para aprender tallado detallado, mientras que las ceras más blandas y flexibles pueden ser una forma divertida de adentrarse en la escultura de formas más orgánicas. Este tipo de experiencia práctica es invaluable para desarrollar una sensación intuitiva de las propiedades de cada cera.
Solución de problemas comunes en el tallado
Algunos problemas comunes para principiantes son romper partes delicadas, hacer marcas accidentales o terminar con superficies irregulares. Créeme, todos hemos pasado por eso. Para evitar que las cosas se rompan, siempre usa una presión suave y controlada con tus herramientas. Usa un toque ligero y haz varias pasadas pequeñas en lugar de intentar remover demasiado material de una vez. Si haces una marca, que a menudo es causada por herramientas desafiladas o simplemente mala técnica, a menudo puedes arreglarla reconstruyendo el área con un bolígrafo de cera. Las superficies irregulares se pueden corregir con limado y lijado consistentes, pasando a granos progresivamente más finos. La paciencia y la práctica son realmente la clave para superar estos obstáculos iniciales y perfeccionar tu técnica.
¿Cuál ha sido el mayor desafío que has enfrentado al comenzar con el tallado en cera? ¡Comparte tu experiencia en los comentarios abajo! Me encantaría escucharlo.
[Download our Free Beginner's Wax Project Checklist]
Técnicas Avanzadas para Fundición Profesional
Para quienes buscamos realmente llevar al límite nuestros diseños, las técnicas avanzadas de tallado en cera son la clave. Permiten crear piezas verdaderamente únicas y complejas desbloqueando todo el potencial de la cera para fundición profesional.
Creando Detalles Intrincados
Para lograr esos detalles intrincados impresionantes, necesitas una combinación de herramientas especializadas, una técnica disciplinada y un profundo entendimiento de la cera que usas. A menudo confío en piezas dentales de alta velocidad con fresas finas, micro-limas y escultores de cera precisos para reproducir cosas extremadamente delicadas como filigranas finas, texturas diminutas o grabados en miniatura. La estabilidad de tu cera para diseños detallados, como una cera de tallado muy dura, es absolutamente crítica aquí, ya que mantiene la distorsión al mínimo durante el meticuloso proceso de trabajo de detalles. Manejar los subcortes y asegurar una limpieza perfecta durante la quema también se vuelve aún más importante con estas formas complejas.
Diseños Híbridos de Cera para Piezas Complejas
Como fundidores profesionales, a menudo usamos diseños híbridos de cera, lo que significa combinar diferentes tipos de cera o incluso integrar patrones de resina impresos en 3D para superar obstáculos de diseño y trabajar de manera más eficiente. Por ejemplo, podría tallar una estructura central con una cera rígida Ferris Firm Green Wax para estabilidad, pero luego añadir elementos delicados y fluidos usando un bolígrafo de cera más blando y maleable o soldando partes de cera preformadas. Este enfoque te permite crear piezas increíblemente complejas y multipartes que podrían ser imposibles con un solo tipo de cera, optimizando tanto el detalle como la resistencia general de la pieza durante su manipulación.
Garantizando Productos Finales de Alta Calidad
Para garantizar un producto final de alta calidad, debes ser meticuloso en cada etapa. Todo comienza con un modelo de cera absolutamente perfecto, sin imperfecciones ni polvo. Tu sistema de canales debe estar cuidadosamente diseñado para gestionar el flujo de metal y permitir la salida del aire. El proceso de inversión debe realizarse a la perfección para evitar burbujas o fundiciones defectuosas. Finalmente, seleccionar la temperatura de fundición adecuada y usar la técnica correcta (como vacío o centrífuga) para tu metal específico es lo que asegura un llenado completo y sin fallas. Aplicar consistentemente estas prácticas avanzadas es lo que realmente eleva la calidad e integridad de tu joyería fundida.
Tabla Comparativa de Ceras & Guía de Selección
Tomar una decisión inteligente sobre la mejor cera para joyería requiere una visión clara de todas tus opciones. Para ayudar con eso, hemos preparado esta tabla comparativa de ceras y guía de selección para consolidar la información clave.
Comparación Lado a Lado de Propiedades de Cera
| Tipo de cera | Dureza | Flexibilidad | Retención de detalles | Residuo de combustión | Usos comunes | Nivel de habilidad ideal |
|---|---|---|---|---|---|---|
| Ferris Firm Green Wax | Difícil | Bajo | Excelente | Muy bajo | Tallados intrincados, detalles nítidos, filigrana | Intermedio-Profesional |
| Cera de talla azul | Medio | Bajo | Excelente | Muy bajo | Tallado general, diseños pequeños a medianos | Principiante-Profesional |
| Cera de talla púrpura | Medio | Medio | Bueno | Muy bajo | Formas escultóricas, se necesita algo de flexibilidad | Principiante-Intermedio |
| Cera en lámina rosa | Suave | Alta | Bueno | Bajo | Diseños planos, construcción de estructuras más grandes, reparaciones | Principiante-Intermedio |
| Ceras de inyección (varias) | Varía | Varía | Excelente | Muy bajo | Producción en masa, diseños repetibles | Profesional |
*Solo una nota: La dureza y flexibilidad pueden variar un poco entre diferentes marcas, incluso para ceras del mismo color.*
Mejor cera para tipos específicos de joyería
Para anillos con engastes intrincados o garras delicadas, una cera dura para tallar como Ferris Firm Green Wax (puedes comprar Ferris Green Wax aquí) suele ser la mejor cera para joyería, porque mantiene esos detalles finos perfectamente. Para colgantes más grandes y escultóricos o pulseras de forma libre, puede que encuentres que una cera de talla un poco más suave o media es más indulgente para trabajar. Y cuando haces muchos componentes idénticos como traseras de pendientes o cierres, usar un sistema de cera de inyección es, con mucho, la forma más eficiente y rentable. La joyería que necesita componentes flexibles antes de fundir puede beneficiarse mucho de las propiedades de las láminas de cera para fundición.
Recomendaciones por nivel de habilidad
Para quienes buscan cera para principiantes, sugeriría comenzar con una cera de talla de dureza media. Te ofrece un gran equilibrio entre ser fácil de tallar y mantener bien los detalles. A medida que adquieras más experiencia, puedes empezar a experimentar con ceras más duras para diseños más intrincados y ceras más suaves por sus habilidades únicas de escultura. La cera para fundición profesional a menudo implica una mezcla estratégica de varios tipos de cera, incluyendo ceras avanzadas de inyección y ceras específicas para los canales de colada, para realizar producciones complejas y de alto volumen con calidad constante. La práctica regular y la disposición a explorar diferentes tipos de cera para joyería definitivamente perfeccionarán tus habilidades y abrirán tus posibilidades creativas.
Preguntas frecuentes (FAQ)
¿Cómo debo almacenar correctamente mi cera para tallar?
Esa es una gran pregunta. Para evitar que tu cera para tallar se deforme o dañe, guárdala en un lugar fresco y seco, alejado de la luz solar directa y el calor. También me aseguro de mantener mis diferentes tipos de cera separados para que no se contaminen entre sí.
¿Puedo mezclar diferentes tipos de cera?
Generalmente, no lo recomendaría a menos que seas un experto. Dicho esto, algunos joyeros mezclan tipos de cera para efectos específicos, como construir una forma compleja con una cera más dura y luego añadir detalles delicados con un bolígrafo de cera más blando y maleable. Solo ten en cuenta que diferentes ceras pueden tener distintas temperaturas de quemado y niveles de residuo, lo que puede complicar las cosas.
¿Cuál es el costo promedio de la cera Ferris vs. la cera de inyección?
El costo puede variar bastante dependiendo de cuánto compres y dónde lo adquieras. Normalmente, las ceras para tallar como Ferris Firm Green Wax se venden en barras o bloques y pueden costar entre $10 y $30 por pieza. Las ceras de inyección suelen venderse en cantidades mayores, como bolsas de 1 libra, y pueden costar entre $20 y $50 por libra, pero el costo por pieza para modelos inyectados termina siendo mucho menor porque es muy eficiente para la producción.
Elegir la cera adecuada es realmente un arte en sí mismo—una decisión que realmente apoya el éxito de cada proyecto de fundición a la cera perdida. Al entender los diferentes tipos de cera para joyería, desde la meticulosa Ferris Firm Green Wax hasta las versátiles láminas de cera para fundición, te das una ventaja poderosa. Cuando puedes analizar las propiedades de la cera para fundición, apreciar las diferencias entre cera dura vs cera blanda, y seleccionar la mejor cera para joyería según las necesidades de tu diseño, estás preparando tus modelos de cera para la perfección. Ya sea que busques cera para diseños detallados, intentes optimizar tu cera para canales, o simplemente necesites una guía de selección de cera confiable, este conocimiento es tu plano para crear joyas realmente excepcionales. Domina estas elecciones, y te prometo que tus proyectos de fundición darán resultados impresionantes una y otra vez.
¿Listo para dar vida a tu visión? Has aprendido la teoría, ahora es momento de conseguir los materiales. Explora nuestra selección curada de ceras y herramientas de talla de grado profesional, todas recomendadas por joyeros, para joyeros. [Shop All Casting Waxes & Tools]
Esta guía fue escrita por John, un joyero con más de 15 años de experiencia en diseño personalizado y fundición a la cera perdida.

