Kreative DIY Halskædeidéer: Skil dig ud med unikke designs ved hjælp af vedhængsindfatninger
Introduktion til kreative smykkedesigns
Når det kommer til at udtrykke individualitet, taler intet højere end kreative smykkedesigns. DIY-halskæder giver en unik mulighed for at skabe stykker, der virkelig afspejler din personlighed og stil. Uanset om du er inspireret af dristige statement-stykker eller delikate minimalistiske designs, er mulighederne uendelige. Ved at skabe dine egne halskæder skiller du dig ikke kun ud fra mængden, men tilfører også dine smykker et personligt præg, som købte stykker simpelthen ikke kan matche. Denne rejse ind i kreativ smykkefremstilling giver dig mulighed for at udforske forskellige materialer, teknikker og kunstneriske påvirkninger, hvilket sikrer, at hvert stykke, du skaber, er lige så unikt som dig. Lad os dykke ned i DIY-halskædernes verden og opdage, hvordan du kan forvandle simple materialer til betagende bærbar kunst.
Hvorfor gør gør-det-selv-halskæder sig bemærket
DIY-halskæder skiller sig ud, fordi de giver dig mulighed for at skabe noget virkelig unikt og personligt. Når du laver din egen halskæde, har du friheden til at vælge hver eneste detalje, fra materialerne til designet, hvilket sikrer, at den afspejler din individuelle stil. I modsætning til masseproduceret smykker bærer DIY-halskæder en særlig betydning og historie bag sig. De kan tilpasses til at matche specifikke outfits, lejligheder eller endda stemninger, hvilket gør dem alsidige og unikke. Derudover er processen med at lave din egen halskæde ikke kun kreativ, men også utroligt givende. Det er en chance for at udtrykke dig selv og bære et kunstværk, som ingen andre har. DIY-halskæder er mere end accessories—de er et udtryk for din kreativitet og personlighed.
Personlige Halskæde Koncepter: At Gøre et Statement
Fremstilling af erklæringshalskæder
At lave statement-halskæder handler om at gøre et dristigt indtryk med dit smykke. Når jeg skaber disse stykker, fokuserer jeg på at bruge større, iøjnefaldende elementer, der tiltrækker opmærksomhed. Tænk på overdimensionerede vedhæng, chunky perler eller indviklet metalarbejde. Nøglen er at balancere halskædens størrelse og vægt, så den er behagelig at bære, samtidig med at den tiltrækker opmærksomhed. Jeg inkorporerer ofte unikke materialer som harpiks, træ eller endda genbrugte genstande for at tilføje et personligt præg. Vær ikke bange for at eksperimentere med farver og teksturer—at blande metaller, sten og stoffer kan resultere i et virkelig unikt stykke. Husk, en statement-halskæde er ment som midtpunktet i dit outfit, så lad din kreativitet skinne og design noget, der afspejler din personlighed og stil.
Inkorporering af personlige præg
At inkorporere personlige detaljer i dine DIY-halskæde designs er det, der virkelig gør dem unikke og meningsfulde. Når jeg laver en halskæde, tænker jeg altid på den historie, jeg ønsker, den skal fortælle. Uanset om det er at tilføje en charm, der repræsenterer et kærkomment minde, gravere initialer eller bruge materialer, der har sentimental værdi, forvandler disse detaljer et simpelt smykke til en personlig skat. For eksempel brugte jeg engang en lille muslingeskal fra en familieferie som midtpunktet i en halskæde, og det blev et bærbart minde. Vær ikke bange for at eksperimentere med elementer, der afspejler din personlighed eller modtagerens – som at inkorporere fødselssten, yndlingsfarver eller endda små håndskrevne noter. Disse betænksomme tilføjelser får ikke kun halskæden til at skille sig ud, men skaber også en dybere forbindelse til stykket. Husk, de bedste designs er dem, der bærer et stykke af dit hjerte.
Kunstnerisk Smykkeinspiration: Frigørelse af Kreativitet
Finder inspiration i hverdagen
At finde inspiration til dine DIY-halskæde designs kan være så simpelt som at observere verden omkring dig. Hverdagslivet er fyldt med kreative idéer, der venter på at blive forvandlet til unikke smykker. Start med at tage en gåtur i naturen—bemærk bladenes former, blomsterfarverne eller barkens teksturer. Disse elementer kan inspirere til organiske vedhængsdesigns eller jordnære farvepaletter. Byområder er lige så rige på inspiration. Arkitektoniske detaljer, gadekunst eller endda mønstrene på en cafédug kan vække idéer til geometriske eller abstrakte halskæde designs. Overser ikke dine personlige oplevelser—minder, yndlingscitater eller meningsfulde symboler kan indarbejdes i dine kreationer for at gøre dem helt unikke. Hav en lille notesbog eller brug din telefon til at skrive idéer ned, når de opstår. Inspiration kan ramme når som helst, hvad enten du nyder en kop kaffe, kigger på et loppemarked eller bladrer i et magasin. Ved at være opmærksom og åben for skønheden i hverdagens øjeblikke, vil du aldrig løbe tør for kreativ energi til dine DIY-halskædeprojekter.
Udforskning af kunstneriske stilarter og teknikker
At udforske kunstneriske stilarter og teknikker åbner en verden af kreativitet for gør-det-selv halskædeentusiaster. Jeg har erfaret, at eksperimentering med forskellige kunstneriske tilgange kan forvandle et simpelt stykke til et unikt mesterværk. For eksempel tilføjer blanding af abstrakte malerteknikker med perlearbejde et moderne twist, mens inkorporering af traditionelle broderimønstre bringer en vintage charme. En af mine foretrukne metoder er at bruge mixed media, hvor metaller, stoffer og naturlige elementer som træ eller skaller kombineres. Dette tilføjer ikke kun tekstur, men fortæller også en historie gennem materialerne. Teknikker som trådindpakning eller resinstøbning kan løfte dine designs og få dem til at skille sig ud. Vær ikke bange for at hente inspiration fra kunstbevægelser som Art Deco eller boheme-stilarter – de kan guide dine farvepaletter og former. Husk, nøglen er at lade din fantasi flyde og omfavne det uventede. Ved at udforske disse stilarter og teknikker vil du skabe halskæder, der er lige så unikke som dig.
Specialdesignede vedhæng: Fra koncept til skabelse
Design din egen vedhæng
At designe din egen vedhæng er en spændende måde at udtrykke din kreativitet på og skabe et virkelig unikt smykke. Start med at skitsere dine idéer og overvej former, symboler eller motiver, der resonerer med dig. Tænk over den historie, du ønsker, at dit vedhæng skal fortælle—om det er et personligt minde, en kulturel reference eller en simpel æstetisk præference. Når du har et koncept, vælg materialer, der passer til din vision, såsom metal, ler eller endda genbrugte genstande for et miljøvenligt præg. Eksperimenter med teksturer, farver og finish for at bringe dit design til live. Vær ikke bange for at gentage og forfine din idé, indtil den føles helt rigtig. Denne proces resulterer ikke kun i et unikt vedhæng, men tilføjer også et dybt personligt element til din DIY-halskæde.
Valg af materialer og indstillinger
Når det kommer til at lave din egen DIY-halskæde, er det afgørende at vælge de rigtige materialer og indfatninger for at bringe din vision til live. Jeg starter altid med at overveje det overordnede æstetiske udtryk, jeg ønsker at opnå—om det er boheme, minimalistisk eller vintage-inspireret. Til vedhæng elsker jeg at eksperimentere med løse ædelsten, perler eller endda upcyclede genstande som muslingeskaller eller gamle charms. Den indfatning, du vælger, kan dramatisk forbedre designet; for eksempel tilføjer en sølv marquise-indfatning et moderne præg, mens en guldbesætning udstråler tidløs elegance. Glem ikke at tænke på holdbarhed og komfort—vælg materialer som sterlingsølv eller rustfrit stål for lang levetid. Ved omhyggeligt at vælge materialer og indfatninger kan du skabe en halskæde, der ikke kun er unik, men også en sand afspejling af din personlige stil.
Farverige og boheme halskædestilarter
Omfavner levende farver
At omfavne levende farver i dine DIY-halskæde-designs kan forvandle et simpelt smykke til en dristig erklæring. Da jeg først begyndte at eksperimentere med farverige materialer, opdagede jeg, hvordan nuancer kan vække følelser og sætte tonen for hele dit outfit. Tænk på at inkorporere lyse ædelsten, farverige perler eller endda malede vedhæng for at tilføje et energiboost til din kreation. At blande og matche nuancer kan skabe en dynamisk, iøjnefaldende effekt, mens det at holde sig til en bestemt farvepalette kan give din halskæde et sammenhængende, poleret udseende. Vær ikke bange for at træde uden for din komfortzone—livlige farver kan give liv til dine designs og gøre dem virkelig unikke. Uanset om du er inspireret af naturen, kunsten eller din egen fantasi, er det at omfavne levende farver en sikker måde at få din DIY-halskæde til at skille sig ud.
Bøhmiske påvirkninger i smykkedesign
Boheme-inspirationer i smykkedesign bringer en følelse af frihedselskende kreativitet og individualitet til dine DIY-halskædeprojekter. Med inspiration fra den boho-chic æstetik indeholder disse designs ofte naturlige materialer som læder, træ og halvædelstene, kombineret med levende farver og indviklede mønstre. Tænk på at lagdele flere halskæder med forskellige teksturer og længder for at skabe et unikt, eklektisk look. Inddragelse af elementer som kvaster, fjer og makramé kan tilføje et strejf af boheme-stil, hvilket får dit smykke til at skille sig ud. Omfavn boho-stemningen ved at eksperimentere med asymmetriske designs og blande metaller for en virkelig personlig statement-halskæde, der afspejler din kunstneriske ånd.
Minimalistiske og vintage-inspirerede DIY-halskæder
Skabelse af tidløse minimalistiske designs
At skabe tidløse minimalistiske designs til gør-det-selv halskæder handler om at omfavne enkelhed og elegance. Når jeg laver minimalistiske halskæder, fokuserer jeg på rene linjer, subtile detaljer og materialer af høj kvalitet, der kan modstå tidens prøve. Start med at vælge et enkelt fokuspunkt, såsom en delikat vedhæng eller en lille ædelsten, og kombiner det med en tynd kæde i sølv eller guld. Nøglen er at undgå at overfylde designet – lad hvert element skinne for sig selv. Jeg henter ofte inspiration fra naturen eller geometriske former for at skabe smykker, der føles både moderne og klassiske. Minimalistiske halskæder er alsidige, hvilket gør dem perfekte til lag-på-lag eller til at bære alene. Ved at holde designet afdæmpet sikrer du, at det forbliver en fast del af din smykkesamling i mange år fremover.
Inkorporering af vintageelementer
At inkorporere vintage elementer i dine DIY halskæde designs kan tilføre en tidløs charme og unik karakter til dine kreationer. Jeg elsker at gennemse loppemarkeder og antikvitetsbutikker for gamle brocher, knapper og perler, der fortæller en historie. Disse stykker bærer ofte en følelse af historie og håndværk, som moderne materialer ikke kan efterligne. For eksempel kan genanvendelse af en delikat cameo eller en udsmykket filigran vedhæng øjeblikkeligt løfte din halskæde til et unikt statement-stykke. At blande disse vintage fund med moderne elementer, som minimalistiske kæder eller moderne ædelstene, skaber en smuk balance mellem gammelt og nyt. Denne tilgang får ikke kun dine smykker til at skille sig ud, men giver også nyt liv til glemte skatte. Begynd at udforske fortiden for at skabe halskæder, der er lige så unikke som dig!
Vedhængsindstillinger til løse ædelstene
Forståelse af vedhængsbeslag
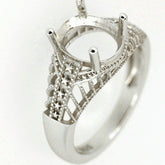
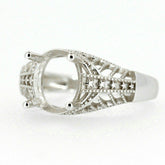
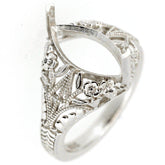
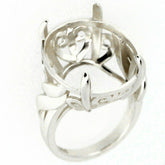
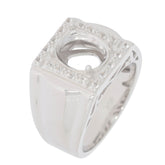
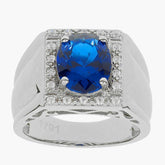
At forstå vedhængsbeslag er essentielt for at skabe unikke DIY-halskæder, der virkelig skiller sig ud. Når du designer dit eget vedhæng, spiller det beslag, du vælger, en afgørende rolle både for æstetikken og funktionaliteten af dit smykke. Vedhængsbeslag findes i forskellige stilarter, fra simple bezel-indfatninger til indviklede klo-designs, som hver især tilbyder en forskellig måde at fremvise dine ædelsten eller fokale elementer på. For et minimalistisk look kan du overveje en slank bezel-indfatning, der sikkert holder din sten, samtidig med at den bevarer et rent, moderne udseende. Hvis du sigter efter noget mere udførligt, tillader klo-indfatninger mere lys at passere gennem stenen, hvilket forstærker dens glans. Til et vintage-inspireret design kan du vælge filigran- eller halo-beslag, der tilføjer indviklede detaljer og et strejf af elegance. Når du vælger et beslag, skal du tænke på typen af sten, du bruger, og hvordan den komplementerer dit overordnede design. Løse ædelsten kan for eksempel kræve specifikke indfatninger for at sikre, at de holdes sikkert. Derudover kan materialet i beslaget—uanset om det er sølv, guld eller et andet metal—påvirke halskædens holdbarhed og stil. Ved at forstå vedhængsbeslag kan du træffe informerede valg, der løfter din DIY-halskæde fra almindelig til ekstraordinær, og sikre, at din kreation er lige så unik som dig.
Vælg den rigtige indstilling til dine sten
At vælge den rigtige indfatning til dine sten er et afgørende skridt i at skabe en unik DIY-halskæde, der virkelig skiller sig ud. Når jeg designer mine egne vedhæng, tager jeg altid hensyn til typen af sten, jeg arbejder med, og hvordan den vil blive fremvist. For sarte ædelstene vælger jeg bezel-indfatninger, som sikkert omslutter stenen samtidig med, at de tilbyder et slankt, moderne udseende. Hvis jeg vil fremhæve stenens naturlige skønhed, er klo-indfatninger mit foretrukne valg, da de tillader mere lys at passere igennem og dermed øger dens glans. For et mere kunstnerisk præg eksperimenterer jeg nogle gange med åbne bagindfatninger, som skaber en lagdelt effekt, når de kombineres med andre materialer. Husk, at indfatningen ikke kun beskytter din sten, men også komplementerer dens form og farve, så tag dig tid til at vælge klogt. Denne opmærksomhed på detaljer sikrer, at din halskæde bliver et unikt mesterværk.
Smykkeindfatninger i sølv og guld: En guide
Udforskning af sølv Marquise diamantindstillinger
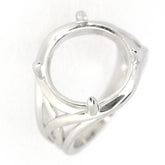
Når det kommer til at skabe en iøjnefaldende DIY-halskæde, kan det valg af indfatning, du træffer, gøre hele forskellen. Sølv marquise diamantindfatninger er et tidløst og elegant valg, der kan løfte dit design. Marquise-slibningen, med sin aflange form og spidse ender, skaber en fantastisk visuel effekt, der tiltrækker opmærksomhed til stenen. Sølv, kendt for sin alsidighed og overkommelighed, komplementerer diamantens glans smukt. For at inkorporere denne indfatning i din DIY-halskæde, start med at vælge en høj kvalitet marquise-slebet diamant eller et overbevisende alternativ som kubisk zirkonia. Vælg derefter en sølvvedhængsindfatning, der sikkert holder stenen, samtidig med at den tillader maksimal lysindtrængning for at forbedre dens glans. Du kan yderligere personliggøre din halskæde ved at tilføje indviklede sølvdetaljer eller kombinere den med komplementære ædelstene. Husk, nøglen til et vellykket DIY-projekt er opmærksomhed på detaljer. Tag dig tid til at sikre, at stenen er sikkert sat, og at det overordnede design afspejler din unikke stil. Med en sølv marquise diamantindfatning får du en halskæde, der ikke kun er smuk, men også en sand afspejling af din kreativitet.
Guldindstillinger til løse sten
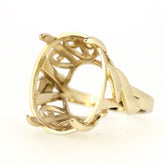
Når det kommer til at fremvise løse sten i dine DIY-halskæder, tilbyder guldsætninger et tidløst og luksuriøst præg. Jeg har erfaret, at guld ikke kun fremhæver ædelstenens naturlige skønhed, men også tilfører en følelse af elegance til ethvert design. Uanset om du arbejder med en blændende diamant, en livlig safir eller en unik halvædelsten, kan guldsætninger løfte dit smykke til et helt nyt niveau. En af mine foretrukne teknikker er brugen af kloindfatninger, som tillader maksimal lysgennemstrømning gennem stenen, hvilket får den til at glitre strålende. For et mere sikkert og indviklet udseende er bezel-indfatninger perfekte, især til sten med uregelmæssig form. Hvis du sigter efter et vintage-inspireret design, kan du overveje at inkorporere filigran- eller milgrain-detaljer i din guldsætning—disse små detaljer kan gøre en stor forskel. Husk, nøglen er at vælge en indfatning, der komplementerer både stenen og din overordnede designvision. Eksperimenter med forskellige stilarter, og vær ikke bange for at blande metaller eller tilføje pynt for en virkelig unik kreation. Med guldsætninger vil din DIY-halskæde ikke kun skille sig ud, men også blive et værdsat stykke bærbar kunst.

